Languages
15Baba Vida Fortress Audio Guide
Baba Vida Fortress is a landmark in Vidin, Bulgaria. Explore it with Stanza's GPS-triggered offline audio guide — available in 15 languages.
Quick Facts
24
Stops
15
Languages
100%
Offline
📍 Vidin, Bulgaria · 43.9932°N, 22.8868°E
About Baba Vida Fortress
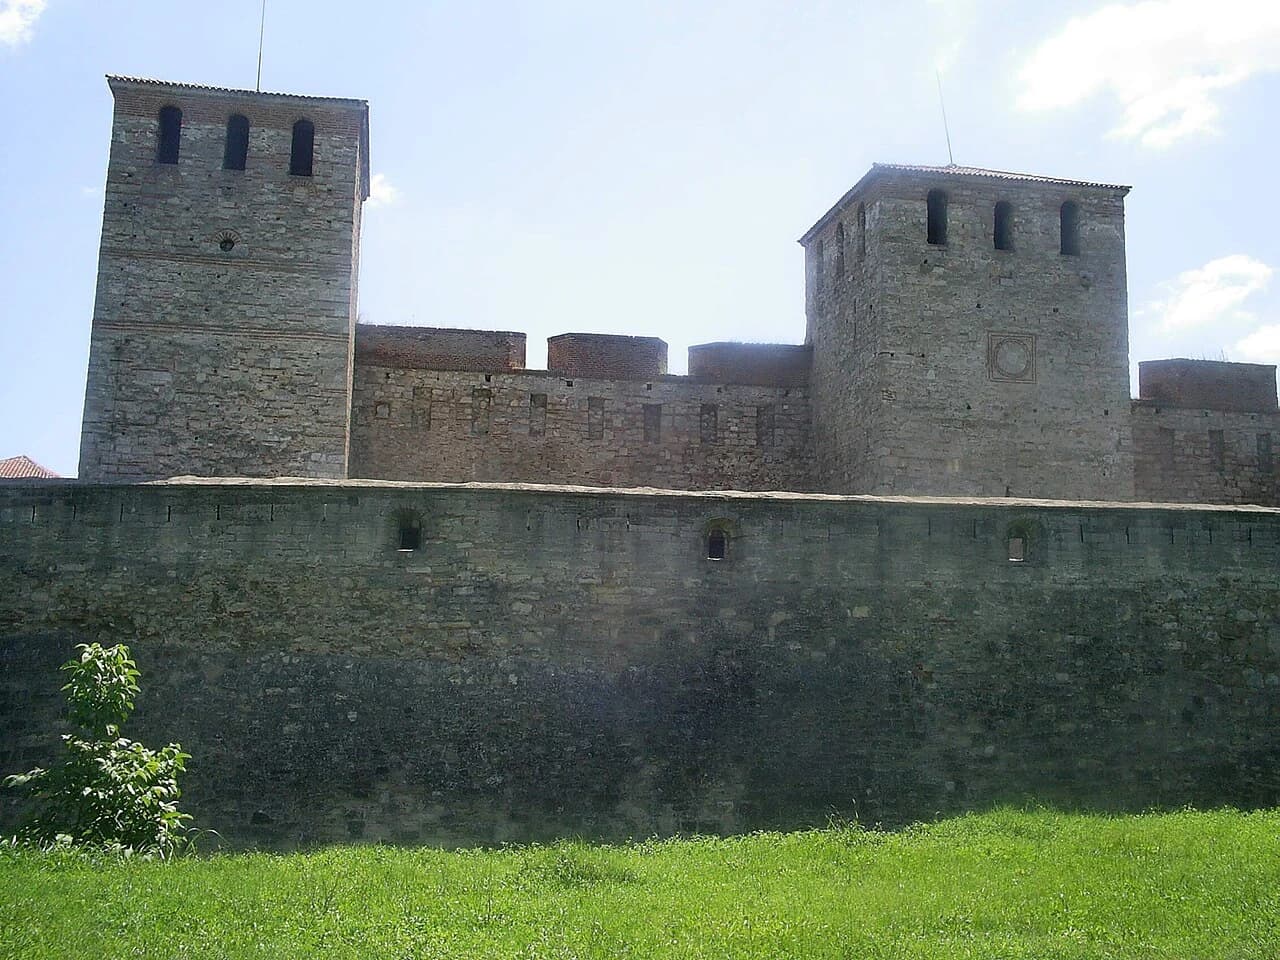
Baba Vida is a well-preserved medieval fortress situated on the banks of the Danube River in Vidin, Bulgaria. It historically served as a defensive stronghold and now functions as a museum.
Baba Vida Fortress is also known as Baba Vida fortress.
This self-guided audio tour features 24 narrated stops organized across 7 sections. As a fortress, Baba Vida Fortress offers a unique cultural experience in the heart of Vidin, Bulgaria.
The Stanza audio guide is available in 15 languages and works entirely offline — download the complete tour including audio narration, maps, and images before your visit. As you walk through Baba Vida Fortress, GPS-triggered narration plays automatically at each point of interest.
Last updated:
What you will hear
The Moat and Stone Bridge
Establishes the first point of contact for visitors, highlighting the water defenses and the bridge approach.
The Moat and High Tower
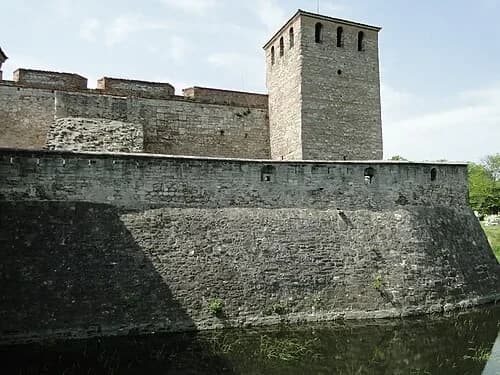
Welcome to Baba Vida, Bulgaria’s most remarkably preserved medieval castle. Standing at an elevation of 39 meters above sea level, this stronghold tells a story spanning two millennia, beginning as a Roman outpost before evolving into the massive structure you see today. The site has served as a royal residence, a military stronghold, and a strategic lookout over the surrounding region. Notice the massive tower rising directly above the surrounding moat; it is one of the tallest points of the structure and offered defenders a complete view of the landscape. The transition from Roman foundations to medieval masonry reflects the changing power dynamics of the Danube region across centuries. Today, the fortress remains an intact example of medieval military architecture, surviving countless sieges and the passage of time. Notice the deep, shadowed moat that remains a defining feature of the exterior today, framing the rugged stone walls that have guarded this bend in the river for generations.
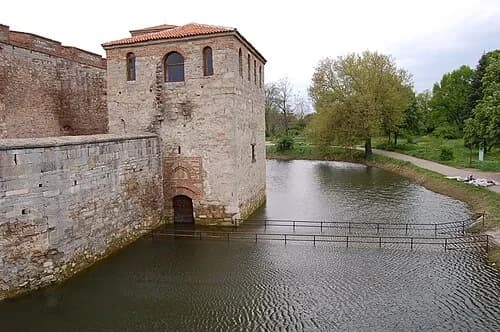
The East Bastion and Bridge
The bridge you are looking at serves as the primary gateway into the outer defensive perimeter of the fortress. Historically, the deep moat below was the very first line of defense for the citadel. Unlike many castles where moats were dry trenches, this one was designed to be filled with water diverted directly from the Danube River. This water barrier made it nearly impossible for heavy siege engines or infantry to approach the main walls without extreme difficulty. The bridge was intentionally kept as the sole entry point, allowing guards to focus all their defensive resources on this single, narrow path. If an enemy managed to cross the water, they would find themselves confined to a small area under constant fire from the towers above. Look at the masonry where the bridge connects to the wall; you can see the heavy stone blocks that have supported this crossing for centuries.
The Concentric Defensive Walls
Explains the 'castle within a castle' design, which is a signature element of Baba Vida's preservation.
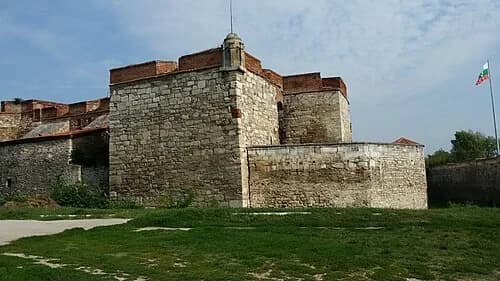
The Defensive Stone Bastion
The immense stone masonry visible here is a physical reminder of the resilience of this stronghold. One of the most significant moments in its history occurred during the 11th century when it faced an eight-month-long siege. Byzantine forces, led personally by Emperor Basil II, surrounded the castle but were unable to break its defenses. The sheer thickness of these walls, built with large, hand-hewn blocks, was designed specifically to withstand the impact of heavy battering rams and early stone-throwing artillery. Notice how the stones are tightly fitted together with minimal mortar, a technique that helped distribute the weight and stress of the structure across the entire foundation. This level of construction expertise ensured that the fortress remained a formidable obstacle for invaders across several centuries. The lower portions of these walls are particularly thick, providing a stable base for the towering bastions that rise above the internal courtyards.
The Gate Tower Entrance
The transition from the exterior to the interior citadel, passing through the massive wooden gates.
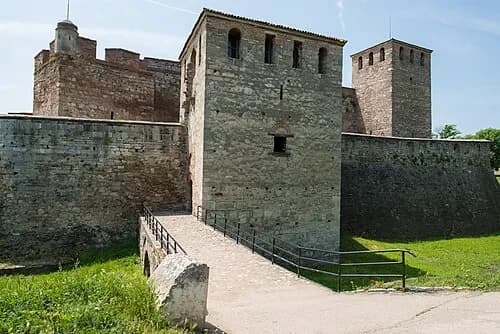
The Stone Entrance Ramp
The stone entrance ramp was designed with a grim and practical purpose: to funnel attackers into what was essentially a kill zone. As you look at the bridge and the ramp leading into the gate, imagine being part of an invading force squeezed into this narrow, uphill passage. Most of the primary medieval construction phases seen here occurred between the 10th and 14th centuries, focusing on maximizing these defensive bottlenecks. From the towers and walls surrounding this entrance, defenders could attack from multiple angles simultaneously. Any army attempting to force their way inside would be exposed and outnumbered in this confined space. This layout is a hallmark of Bulgarian medieval military architecture, where every angle was calculated to provide the defenders with a significant advantage. The heavy paving stones on the ramp are original to the medieval period and have been smoothed by centuries of foot traffic and heavy equipment.
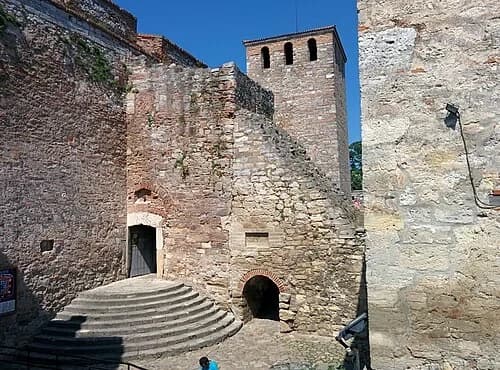
The Inner Citadel Gateway
Moving toward the inner citadel, the gateway reveals a complex history through its varied masonry. Look closely at the walls to see the distinct transition in building styles where the rugged, ancient Bulgarian stonework meets the red brick repairs added later during the Ottoman era. These brick sections are often found near the top of the walls or around the archways, where repairs were necessary after sieges or the natural wear of time. This layered construction highlights how the fortress was continuously maintained and adapted by its various occupiers over many centuries. The archway itself is built with heavy stone blocks, designed to bear the weight of the massive towers above while providing a formidable barrier against intruders. The contrast in building materials is most visible where the mortar changes color, marking the boundary between the medieval and early modern construction phases of the fortress.
The Inner Courtyard
The heart of the medieval citadel where the Bulgarian Tsars lived and managed their kingdom.
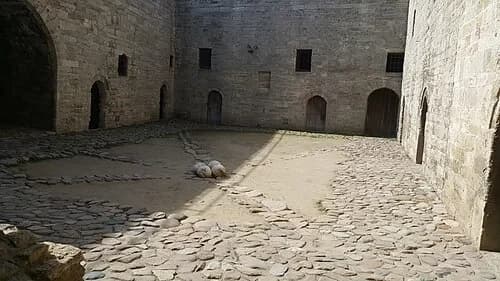
The Central Courtyard
The stones beneath your feet in this central courtyard are part of a foundation that dates back to the Roman Empire. Long before the Bulgarian Tsars arrived, this site was the Roman castellum known as Bononia. The courtyard represents nearly 2,000 years of continuous fortification, with each new era of builders using the foundations of the previous one to save time and resources. Archaeological excavations have revealed Roman pottery and tools buried deep beneath this open space. By building on the Roman ruins, medieval architects benefited from the strategic location already identified by the Romans as the best spot to monitor the river. This courtyard was the heart of the royal residence during the Middle Ages, serving as a hub for military activity and daily life. The uneven ground is a result of the many layers of history buried just beneath the surface, from Roman times to the present day.
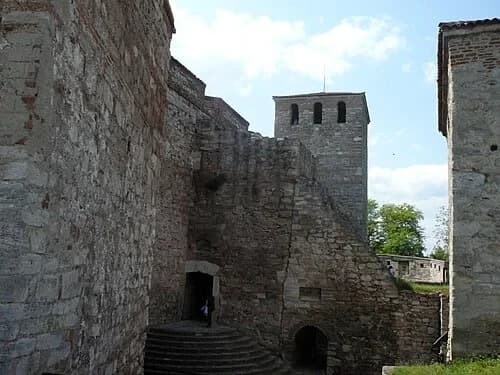
The Last Imperial Capital
This fortress reached the peak of its historical significance between the years 1356 and 1396. During these decades, it served as the capital of the Tsardom of Vidin under the rule of Tsar Ivan Sratsimir. It was a time of cultural flourishing and constant threat, as the fortress became the last major Bulgarian stronghold to withstand the Ottoman conquest. For forty years, Sratsimir ruled his independent kingdom from within these walls, making it a center of trade and Bulgarian culture. Eventually, the fortress fell to the Ottoman Turks in 1396, marking the end of the medieval Bulgarian state. The legacy of the Tsardom remains in the sturdy walls and high towers that have survived into the modern era. Many of the most grand architectural features you see were commissioned during this imperial period to reflect the status of the Vidin kings as independent rulers.
Sratsimir Tower
Focuses on the most significant medieval tower, named after the last Tsar of Vidin.
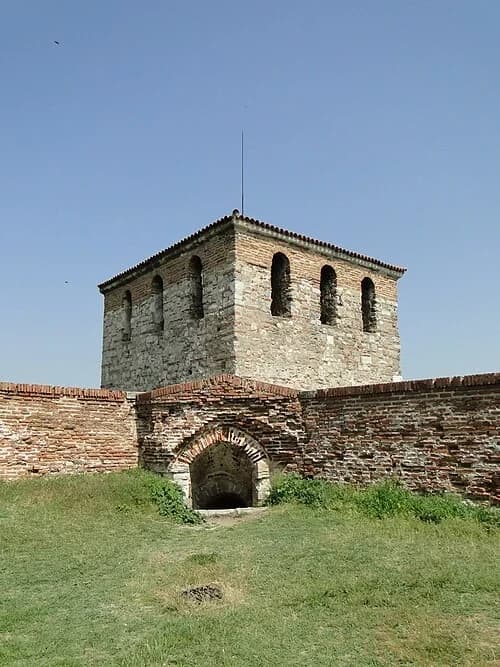
The Sratsimir Tower
Named after the last Bulgarian ruler of Vidin, the Sratsimir Tower is one of only three towers that retain their full original medieval height. Notice the square, solid construction and the battlements at the very top, which allowed guards to fire down on enemies while staying protected. The distinctive arched windows on the upper level follow the original medieval style and served a dual purpose. These openings were not just for defense; they also allowed light and air into the higher chambers of the tower, which were often used as living quarters for high-ranking officers or even members of the royal family. The tower's height made it an excellent observation post for signaling other defensive positions along the Danube. The roof is covered with traditional red tiles, similar in style to those used during the fortress's peak in the 14th century.
The Upper Ramparts and Battlements
The primary defensive position for archers and guards overlooking the surrounding plains.
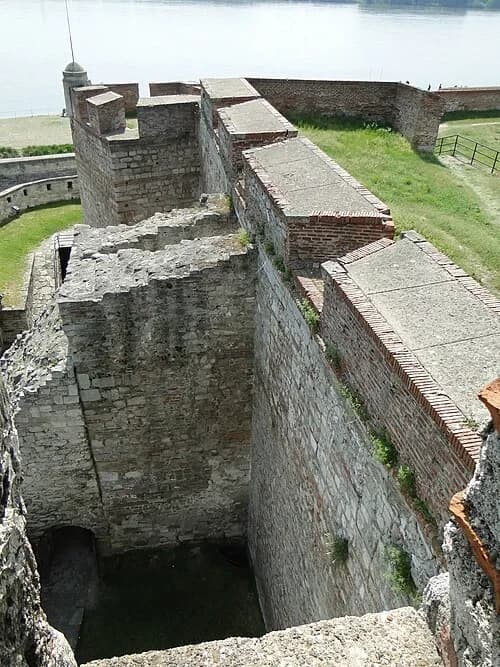
The Defensive Ramparts
Look down from this vantage point to see the clear separation between the two main defensive lines. This wide gap, situated between the high inner walls and the lower outer ramparts, was a core feature of the fortress's tactical design. If an attacking force managed to cross the moat and scale the first wall, they didn't find themselves inside the castle. Instead, they were trapped in this narrow, open space with nowhere to hide. Defenders on the inner walls above would have a clear, unobstructed line of fire from their protected positions. This design turned the area into a lethal enclosure, effectively stalling an assault before it could reach the heart of the citadel. The sheer verticality of the inner stone masonry ensures that anyone below is completely exposed to arrows, stones, or boiling liquids. This layered defense is a primary reason why Baba Vida remained so difficult to capture throughout its long military history, as it effectively nullified the momentum of a successful wall-scaling maneuver.
Artillery and Ottoman Modernization
Shows the transition to gunpowder warfare with cannons positioned on the ramparts.
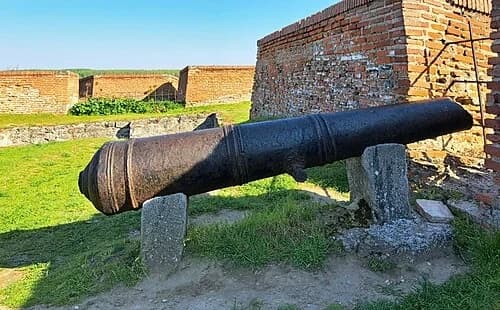
The Iron Fortress Cannon
Standing on the ramparts, you can see a heavy iron cannon, a reminder of how the fortress evolved to meet the demands of gunpowder warfare. By the 18th century, the era of knights and archers had passed, replaced by the roar of artillery. To keep up with these technological changes, the fortress underwent significant modernization. The traditional medieval battlements were no longer sufficient against cannons that could shatter stone walls from a distance. Engineers modified the ramparts to create stable, reinforced platforms capable of supporting the immense weight and recoil of these massive iron guns. These weapons weren't just for defense; they allowed the garrison to control the surrounding landscape and the vital river traffic with long-range firepower. The transition from high, thin medieval walls to thicker, lower artillery-ready structures marked a new chapter in Baba Vida's history. This specific piece of ordnance illustrates the lethal reality of 18th-century combat and the constant need for fortification designs to adapt to increasingly powerful weaponry developed during the Ottoman occupation.
Want to hear the rest?
Download the Stanza app to unlock all 24 stops and full GPS-guided navigation.
Frequently Asked Questions
How long does the Baba Vida Fortress audio tour take?
The Baba Vida Fortress audio guide includes 24 narrated stops. Most visitors spend 45 minutes to 1.5 hours exploring the complete tour, though you can listen at your own pace and skip or revisit any stop.
Is the Baba Vida Fortress audio guide available in my language?
Stanza supports 15 languages: English, Spanish, French, German, Italian, Portuguese, Russian, Japanese, Chinese, Korean, Arabic, Hindi, Polish, Dutch, Hebrew. Check the guide in the app to confirm the languages currently available for this tour.
Can I use the audio guide offline at Baba Vida Fortress?
Yes! Download the complete Baba Vida Fortress tour — including all audio, maps, and images — before your visit. The Stanza app works completely offline, so you don't need WiFi or mobile data at the venue.
How much does the Baba Vida Fortress audio guide cost?
The Stanza app is free to download. The current listed price for the Baba Vida Fortress audio guide is $1.99; app-store region and currency may affect the final price.
How do I use the Stanza audio guide at Baba Vida Fortress?
Download the free Stanza app, search for "Baba Vida Fortress", and download the tour. When you arrive at the venue, the app uses GPS to detect your location and automatically plays the relevant narration as you move between points of interest — completely hands-free.
What makes the Stanza audio guide different from other Baba Vida Fortress tours?
Stanza offers GPS-triggered narration that plays automatically as you walk through Baba Vida Fortress — no need to manually select stops. The tour is available in 15 languages, works fully offline, and includes 24 expertly narrated stops with images and historical context.
What other audio guides are available near Baba Vida Fortress?
Stanza offers multiple audio guides in Vidin, Bulgaria and nearby areas. After downloading the app, browse the map to discover all available tours near Baba Vida Fortress. Each guide can be downloaded for offline use.