Stanza · Audio guide
Citadel of QaitbayAudio guide
A place to remember. A story to take with you.
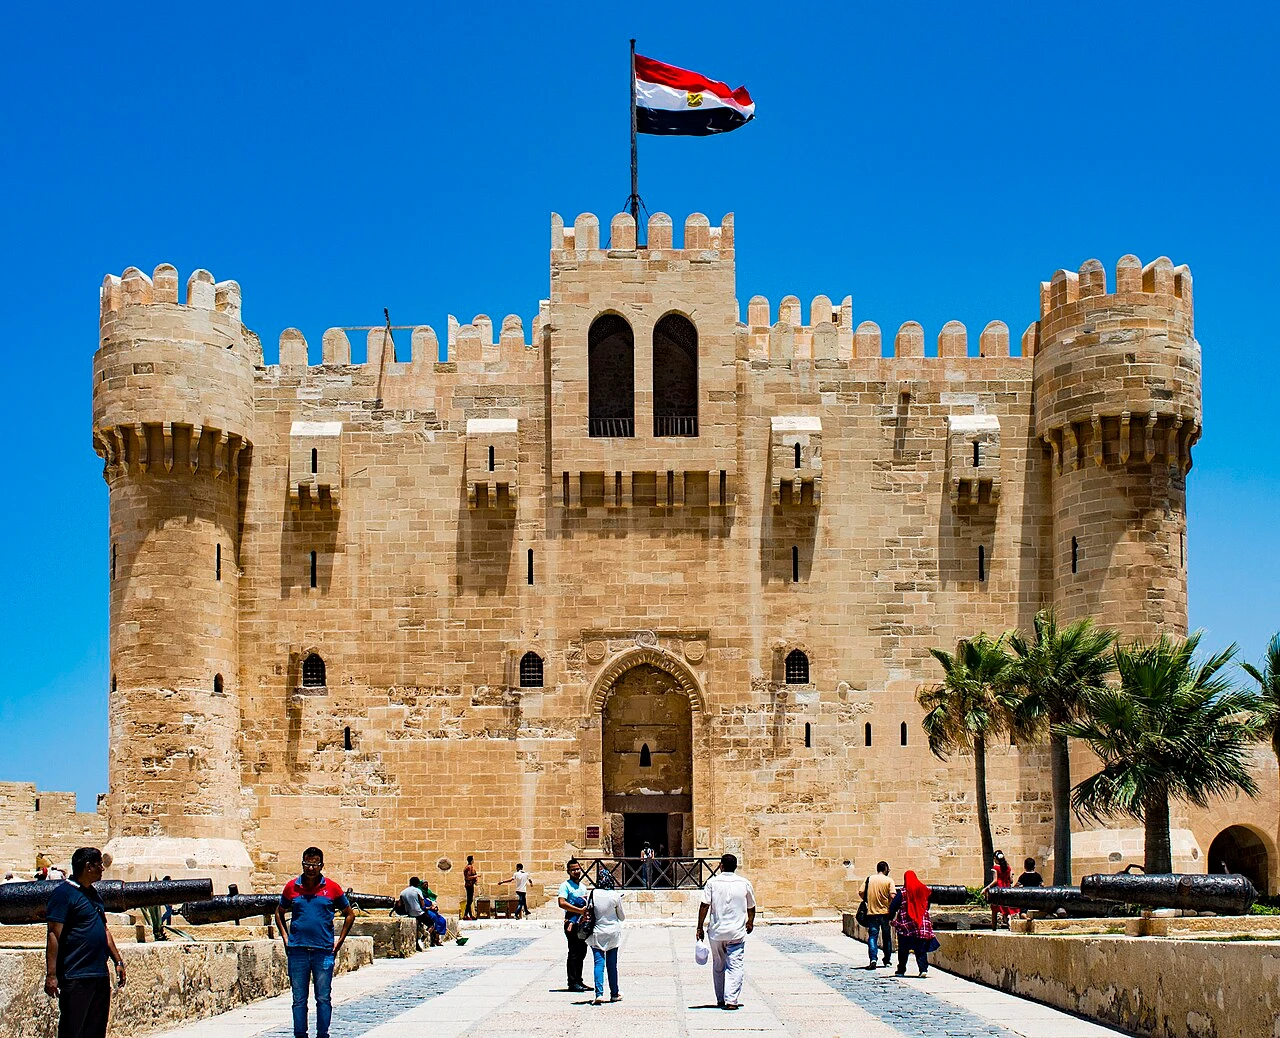
The Citadel of Qaitbay is a 15th-century defensive fortress located on the Mediterranean coast in Alexandria. It was built on the site of the ancient Lighthouse of Alexandria using stones from the original…
Download Stanza, then search for “Citadel of Qaitbay”.
About the tour
One guide. Your kind of visit.
The Citadel of Qaitbay is a 15th-century defensive fortress located on the Mediterranean coast in Alexandria. It was built on the site of the ancient Lighthouse of Alexandria using stones from the original ruins.
Ready when you are.
- 01Get the free Stanza app.
iOS & Android
- 02Find your guide.
“Citadel of Qaitbay”
- 03Download before you go.
Works offline
Audio guide / 23 narrated stops
Inside the guide
Get to know a few of the stories before you go. Open a stop to read more.
01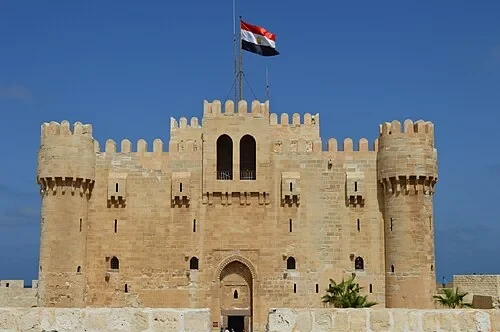 The Main Gate and Outer WallsThe Keep's Main Facade
Welcome to the Citadel of Qaitbay, one of Egypt's most significant coastal strongholds. This central keep, rising exactly seventeen meters above the rocky peninsula, represents a high point of fifteenth-century Mamluk military architecture. Construction began in 1477 under the direct orders of the Mamluk Sultan Al-Ashraf Qaitbay. He sought to secure Alexandria from growing military threats in the Mediterranean basin. The massive building project took only two years to complete, reaching its final form in 1479. Historical records indicate that the Sultan spared no expense, investing more than one hundred thousand gold dinars into the fortress's construction to ensure its durability. As you examine the main facade, observe the pale yellow limestone blocks fitted tightly together. This thick masonry was designed specifically to absorb the kinetic energy of naval cannon fire. The design reflects a highly organized state capable of mobilizing immense resources and engineering talent in a short time. At the top of the keep, crenellated battlements provided cover for archers and soldiers watching the horizon for hostile sail. Today, the keep stands in excellent condition, showing the characteristic defensive bulk of late medieval Egyptian fortifications.
Photo: Ahmed Younis Sif Saad · CC BY-SA 4.0
02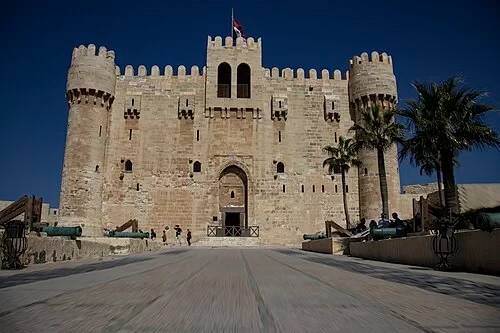 The Main Gate and Outer WallsMain Entrance to the Keep
Before entering the keep, examine the physical pathway and the main gate's architectural design. This entrance features a deep, arched stone portal typical of Mamluk defensive architecture. The doorway itself sits recessed within a heavy stone archway, a placement meant to limit the angle of attack for any battering rams or projectiles brought forward by invaders. Looking up and around the keep, you can identify four semi-circular corner towers that project outward from the main square structure. These towers allowed defenders to secure the surrounding area with a crossfire design. If attackers managed to reach this approach path, they would find themselves funneled into a narrow corridor, exposed to defensive fire from multiple angles above. The design intentionally created a deadly bottleneck, turning the entryway into a defensive trap. Inside the gateway, the passage bends to prevent direct charges and blind rushes into the heart of the keep. Every dimension of this entry sequence shows careful military planning, prioritizing the safety of the garrison over ornamental display. Notice how the stone blocks around the archway are meticulously dressed and aligned, showing the precise construction methods of medieval military masons.
Photo: Amel Esmail · CC BY-SA 4.0
03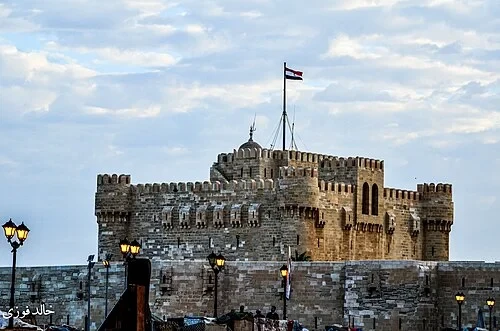 The Main Gate and Outer WallsFortress Seawall View
This vantage point offers a clear look at the layout of the inner and outer defensive walls of the citadel. The entire fortress complex occupies a strategic footprint of 17,550 square meters. It is divided into two distinct rings of defense to ensure maximum protection against naval landings. The outer walls, which bear the brunt of the sea's force and potential enemy artillery, are constructed using exceptionally massive stone blocks. In several key sections, these outer walls reach a thickness of four and a half meters, a structural necessity designed to withstand prolonged bombardment from naval ships. Inside this outer ring, a secondary set of walls provides a backup defensive line, housing the central keep within its protective embrace. This double-walled configuration allowed the garrison to retreat to the inner defenses if the outer perimeter was breached. Gaps and battlements along the top of these thick walls allowed soldiers to monitor naval activity safely. The masonry is heavily weathered by salt and moisture from the Mediterranean, yet the sheer thickness of the walls has kept the structure stable for over five centuries.
Listen in the appPhoto: Khaledfawzy1 · CC BY-SA 4.0
04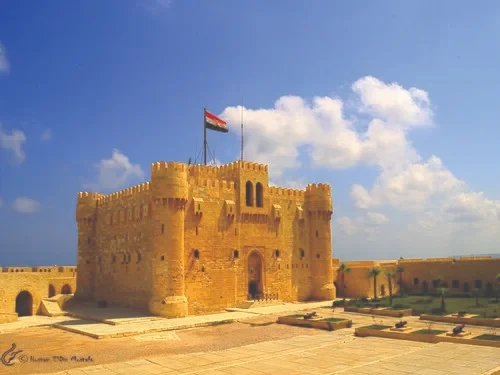 The Outer CourtyardCentral Keep Courtyard
The design of this fortress is credited to the master builder and architect Qagmas Al-Eshaqy, who served as the Edifices Mason under Sultan Qaitbay. This ambitious commission marked a high point in Qagmas's rising administrative and military career, which eventually culminated in his appointment as the Viceroy of Alexandria. His architectural vision is visible in the keep's exceptionally balanced proportions. From this position in the courtyard, you can appreciate the geometric symmetry of the central keep's square base. Each of its four sides measures exactly thirty meters. This strict mathematical layout provided a stable and easily defensible platform for the garrison. Qagmas integrated functional defense with classical Mamluk proportions, creating a structure that was both a military stronghold and an administrative center. The courtyard itself served as an assembly point for troops, where supplies could be moved quickly to the ramparts or the keep. Looking up from the stone floor, the sheer verticality of the thirty-meter walls creates an imposing presence. The pale limestone reflects the bright coastal sun, casting sharp geometric shadows across the open pavement of the courtyard.
Listen in the appPhoto: Hossam-eldin-mostafa · CC BY-SA 3.0
05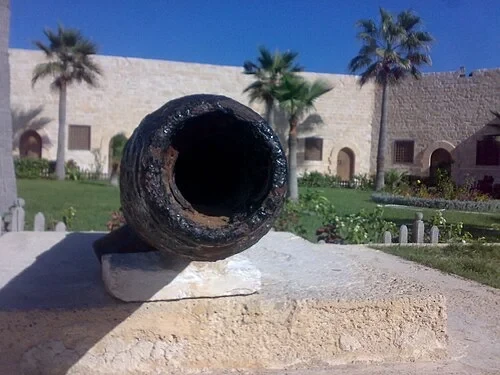 The Outer CourtyardThe Courtyard Cannons
A historic iron cannon rests here, showing a dark, heavily weathered surface from centuries of exposure to salty sea air. This weapon represents the heavy artillery that was crucial for defending the Alexandria coastline from Ottoman naval incursions. Throughout the fifteenth and sixteenth centuries, the Mamluks positioned numerous cannons like this one along the seawalls to deter warships. These guns fired heavy projectiles designed to puncture wooden hulls before invading forces could land. This defensive system faced its ultimate challenge centuries later, during the British bombardment of Alexandria in July 1882. During that conflict, British naval vessels launched a massive attack on the city's fortifications. The citadel's defenders returned fire, but the superior range and explosive power of the British guns caused severe structural damage to the keep and outer walls, leaving parts of the fortress in ruins. The deep pits and textured corrosion on this cannon's barrel testify to its long service on the frontline of coastal defense. Today, it remains on display in the courtyard, sitting on a modern stone mount that keeps it pointed toward the historic harbor.
Listen in the appPhoto: Eman shadofa · CC BY-SA 3.0
06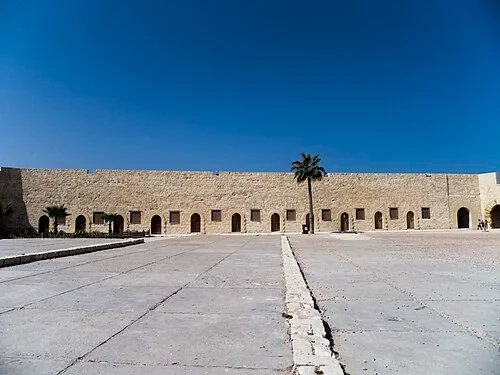 The Outer CourtyardThe Outer Walls and Barracks
A series of uniform stone doorways is built directly into the lower level of the fortress's outer wall. These openings lead to a long row of functional vaulted chambers that lined the perimeter of the spacious outer courtyard. During the height of the citadel's military use, these rooms functioned as essential support infrastructure for the garrison. They housed soldier barracks, stables for horses, and bakeries that supplied the troops with daily rations. Storing food, water, and livestock within the safety of these thick outer walls allowed the defenders to survive prolonged naval sieges when supplies from the mainland were cut off. The rooms are cool and dark, sheltered from the heat of the Egyptian sun by meters of solid stone masonry. Mamluk engineers designed these spaces to be utilitarian, prioritizing structural strength and ventilation over comfort. Today, visitors can walk through these empty stone doorways, which now reveal the simple, repetitive masonry arches that supported the heavy battlements above. The layout shows how a fifteenth-century military outpost functioned as a self-sustaining miniature city.
Listen in the appPhoto: Nan deko · CC BY-SA 3.0
07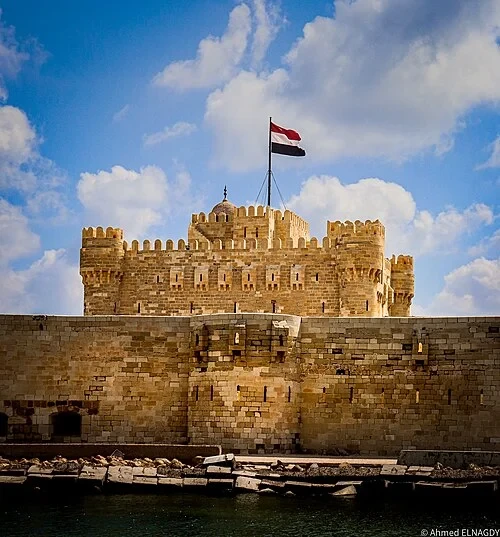 The Site of the Ancient PharosThe Sea-Facing Keep
The sea-facing side of the keep overlooks the approach from the open Mediterranean Sea. This specific side of the fortress required the most robust defensive design, as it was highly vulnerable to direct naval attack. The architects addressed this threat by incorporating semi-circular corner towers that projected outward from the main square body of the keep. These curved structures allowed the garrison to maintain a continuous, three-hundred-and-sixty-degree field of fire along the shoreline. By eliminating blind spots, defenders could target any hostile ships or landing parties attempting to scale the rocky peninsula below. Soldiers positioned on the upper battlements could rain arrows and stones down on attackers, while lower slits allowed for gun and cannon fire. The massive stone base of the keep descends directly toward the water, anchoring the building into the bedrock of the ancient harbor. The lower levels are constructed with thick, solid masonry designed to absorb the heavy shock of incoming waves and artillery. From this angle, the keep appears as an impenetrable barrier, guarding the entrance to Alexandria's harbor.
Listen in the appPhoto: Ahmedelnag5 · CC BY-SA 4.0
08 The Site of the Ancient PharosThe Pharos Lighthouse Site
This engraving illustrates the legendary Pharos Lighthouse, which once occupied the exact rocky peninsula where the Citadel of Qaitbay stands today. Completed in the third century BC, the lighthouse stood over one hundred meters tall, guiding ships safely into Alexandria's busy harbor for over a millennium. However, a series of powerful earthquakes between the eleventh and fourteenth centuries repeatedly damaged the structure, eventually reducing it to a pile of ruins. By the time Sultan Qaitbay decided to fortify the harbor in 1477, the ancient lighthouse was completely gone. Recognizing the tactical value of the site, Qaitbay used the surviving limestone and granite blocks from the lighthouse ruins to build the foundations and walls of his new fortress. This reuse of ancient materials explains the presence of massive red granite columns and blocks embedded in the citadel's walls. This engraving helps visualize the dramatic transformation of this historic site, showing how one of the ancient world's greatest architectural wonders was repurposed into a medieval military stronghold to protect the coast from foreign fleets.
Listen in the appMaarten van Heemskerck · Public domain
09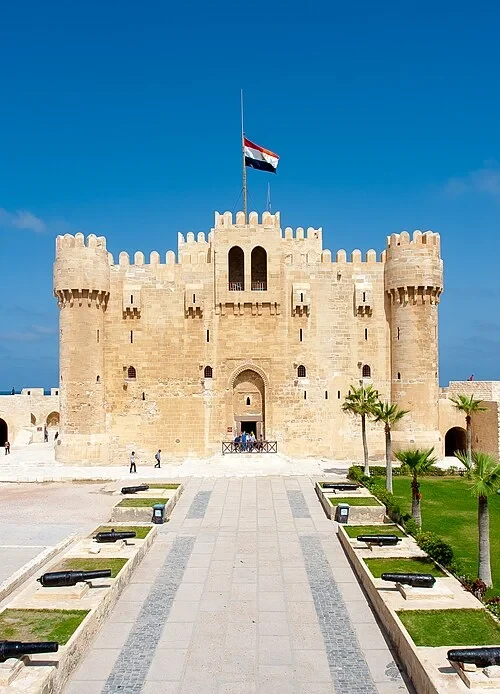 The Main Keep EntranceThe Main Approach Path
The main stone approach path leads directly toward the monumental entrance of the keep. This wide walkway is paved with smooth, light-colored stone tiles and is flanked on both sides by neatly aligned historic iron cannons and young palm trees. The layout is designed to guide visitors straight toward the defensive gate, highlighting the symmetry and scale of the central keep. As you follow this path, look at the stone channels running along the sides of the walkway, which helped drain rainwater away from the foundations. Historically, this approach was a highly secured military zone, keeping visitors and potential attackers in the open where they could be easily monitored from the battlements above. The cannons lining the path are set into landscaped grass beds, contrasting the green vegetation with the light limestone walls of the fortress. The straight path builds anticipation as you approach the keep, with the national flag of Egypt waving on a tall flagpole high above the main archway. The pathway offers a clear, unobstructed view of the defensive towers and the main gateway.
Listen in the appPhoto: Mahmoud Mostafa Ashour · CC BY-SA 3.0
10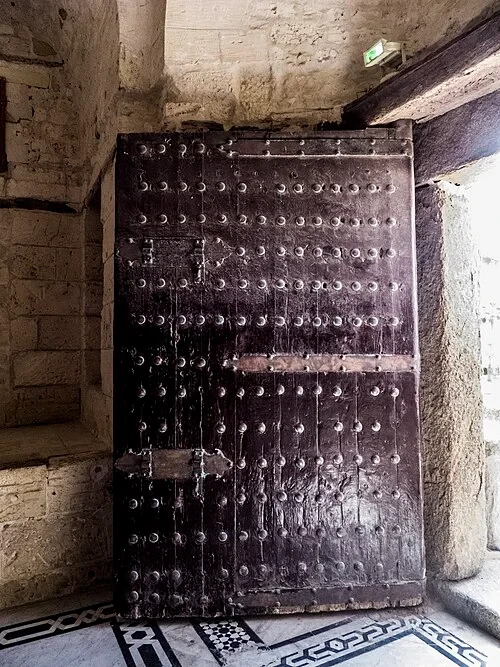 The Main Keep EntranceThe Iron-Studded Doorway
This heavy wooden door secures one of the keep's primary entry points. The surface of the door is reinforced with thick iron plates and a dense grid of large, rounded metal studs. Mamluk military builders used these heavy iron reinforcements to make the wood resistant to fire and splitting from heavy axes or battering rams. The door's massive scale and weight made it nearly impossible to breach through brute force alone. Behind this outer layer, thick iron bars and wooden beams could be slid into deep sockets in the stone walls, locking the door firmly in place from the inside. The dark, weathered wood shows the marks of age, but the iron studs remain firmly embedded in the surface, a testament to the durability of medieval metalwork. Small openings and peepholes allowed guards inside to inspect visitors before opening the gate. This door served as the final line of defense for the keep, separating the vulnerable entry passage from the secure chambers within. The threshold is worn smooth by centuries of footsteps, showing the constant passage of soldiers who once guarded this gate.
Listen in the appPhoto: Nan deko · CC BY-SA 3.0
Citadel of Qaitbay
Frequently asked questions
How much does the guide cost?
Free app download. Listed guide price: $3.99. Guide price shown in the app. Audio guide only. Venue admission is separate.
Can I listen without internet?
Yes. Download the guide’s audio, images, and maps in the app before your visit. Your downloaded content is then available offline.
Can I listen in my language?
Stanza supports 15 languages. Check the app for the languages available for this guide.
Do I need to follow a schedule?
No. This is a self-guided experience. Choose your stops, pause whenever you like, and return to a story at your own pace.
At your own pace
Explore Citadel of Qaitbay.
Download Stanza, then search for “Citadel of Qaitbay”.
Free app download · Guide price shown in the app
Keep exploring
Nearby audio guides
Cairo
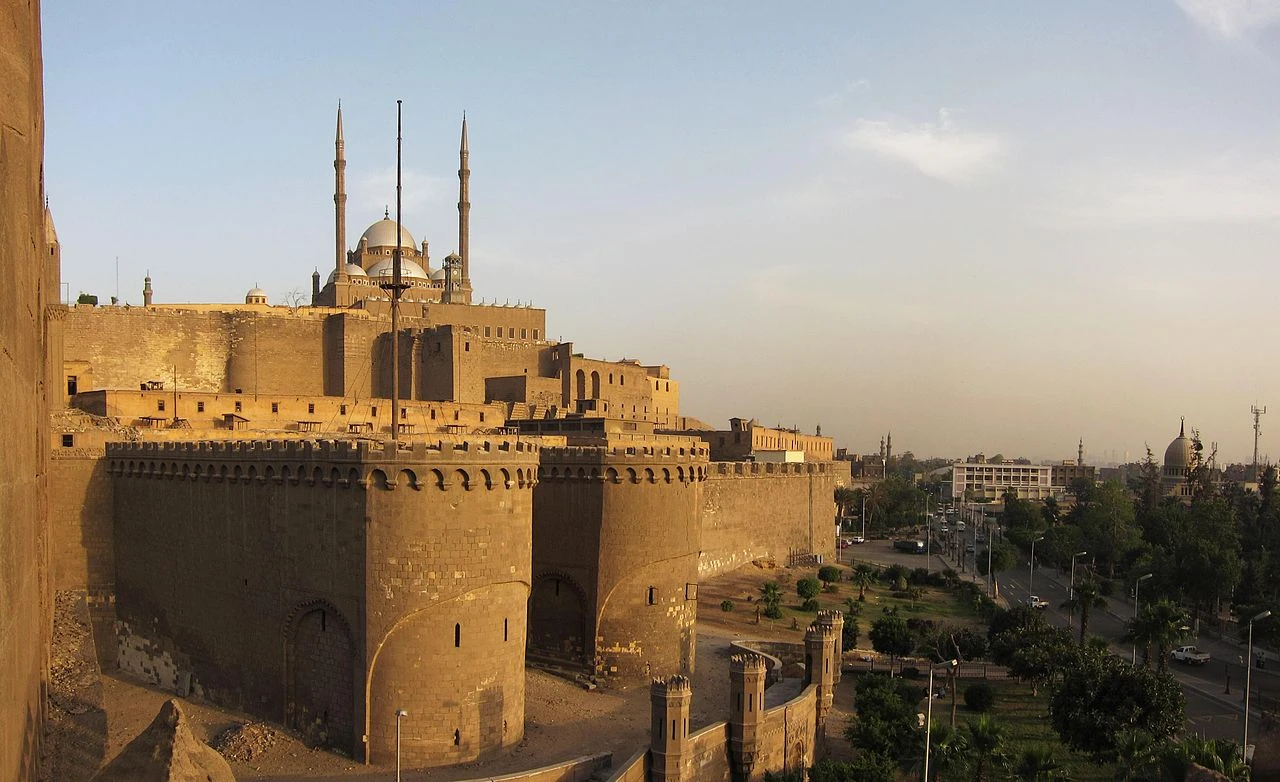
Cairo Citadel
Content & sources
Ahmed Al.Badawy from Cairo, Egypt · CC BY-SA 2.0
Dendera
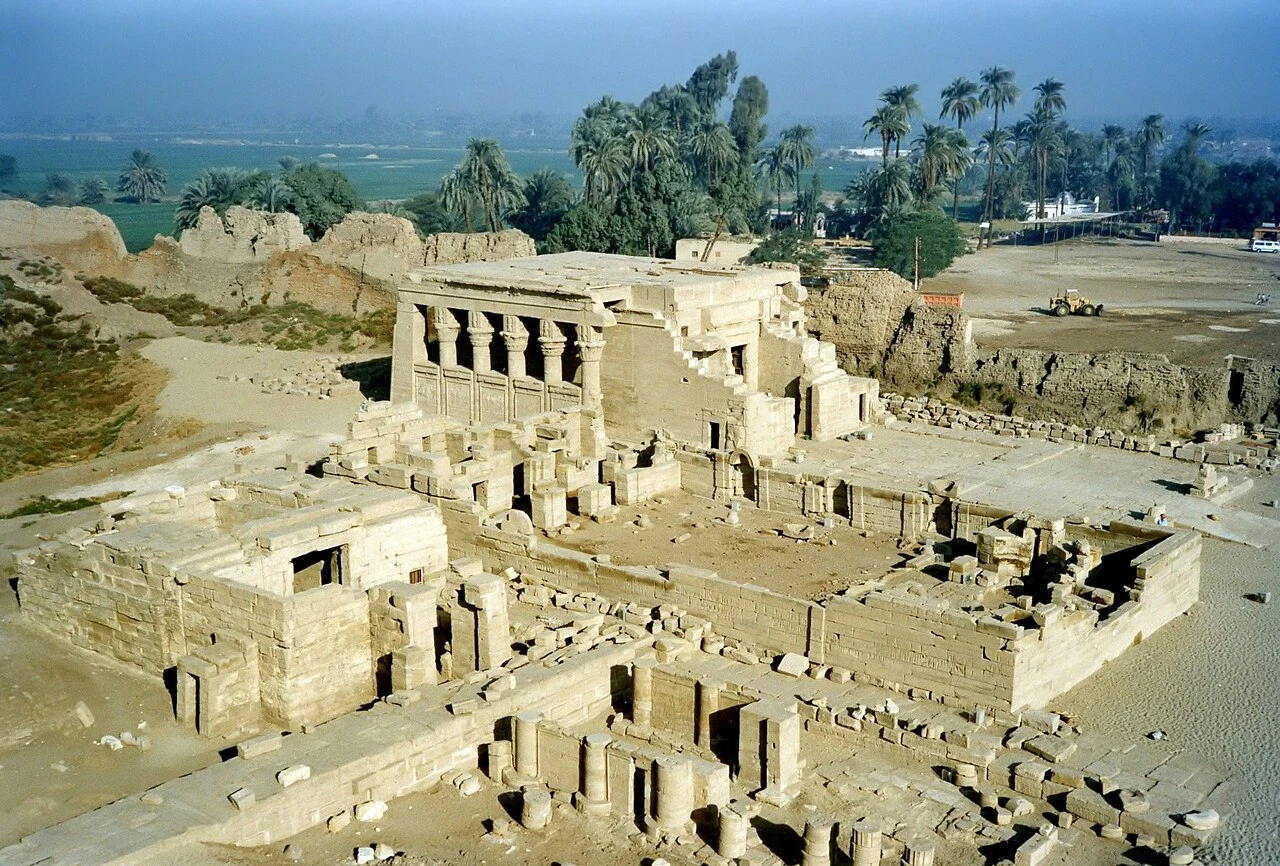
Dendera Temple complex
Content & sources
Bernard Gagnon · CC BY-SA 3.0

Giza
Giza pyramid complex
Content & sources
KennyOMG · CC BY-SA 4.0
Old Karnak
Karnak Temple Complex
Content & sources
René Hourdry · CC BY-SA 4.0