Stanza · Audio guide
Tower of DavidAudio guide
A place to remember. A story to take with you.
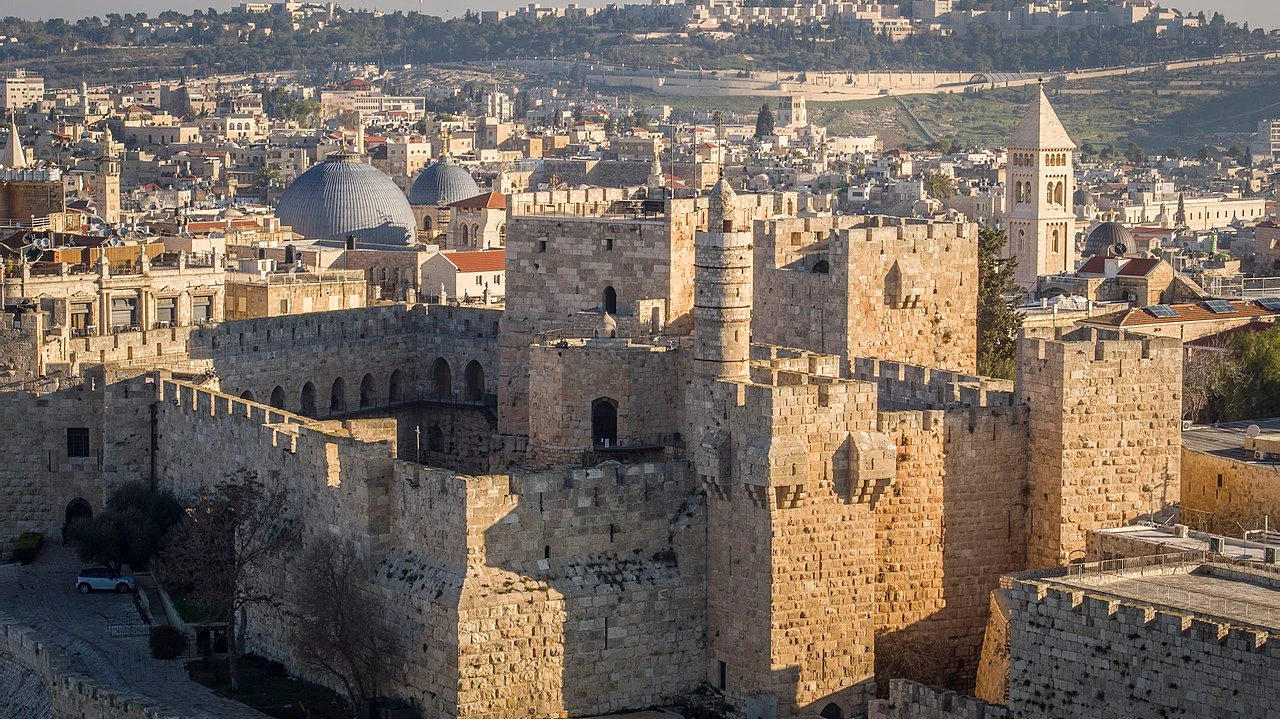
The Tower of David is an ancient citadel located near the Jaffa Gate entrance to the Old City of Jerusalem. It also houses the Jerusalem Museum, dedicated to the city's history.
Download Stanza, then search for “Tower of David”.
About the tour
One guide. Your kind of visit.
The Tower of David is an ancient citadel located near the Jaffa Gate entrance to the Old City of Jerusalem. It also houses the Jerusalem Museum, dedicated to the city's history.
Ready when you are.
- 01Get the free Stanza app.
iOS & Android
- 02Find your guide.
“Tower of David”
- 03Download before you go.
Works offline
Audio guide / 15 narrated stops
Inside the guide
Get to know a few of the stories before you go. Open a stop to read more.
01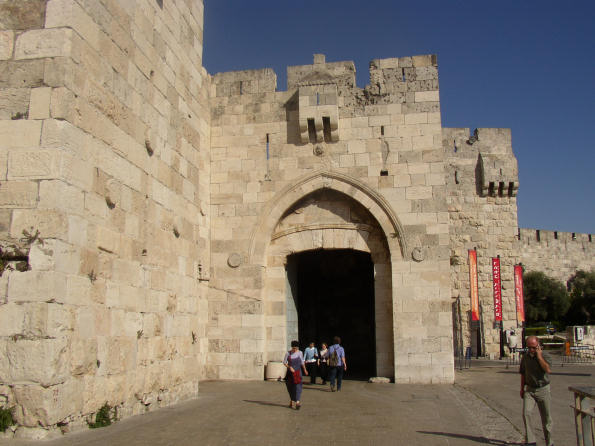 Jaffa Gate and the Outer DefensesThe Jaffa Gate
Welcome to the Jaffa Gate, which serves as the principal entry point into the Old City’s historic Armenian and Christian quarters. This location witnessed a pivotal moment in modern history in December 1917. General Edmund Allenby, leading the British forces, captured Jerusalem from the Ottoman Empire. Unlike many conquerors before him, Allenby famously dismounted from his horse and entered the city on foot. This gesture was a calculated display of respect for the holy city, signaling that he came not as a conqueror on a high horse, but as a humble visitor. The gatehouse you see was part of a massive fortification project undertaken by the Ottoman Sultan Suleiman the Magnificent in 1538. The Sultan's builders designed the entrance to be both functional for commerce and formidable against invaders. Today, the gap in the wall next to the gate—created in 1898 for the visit of the German Emperor Wilhelm II—allows for the flow of modern traffic, yet the original stone portal remains a powerful reminder of the city's strategic importance.
Herwig Reidlinger · CC BY-SA 3.0
02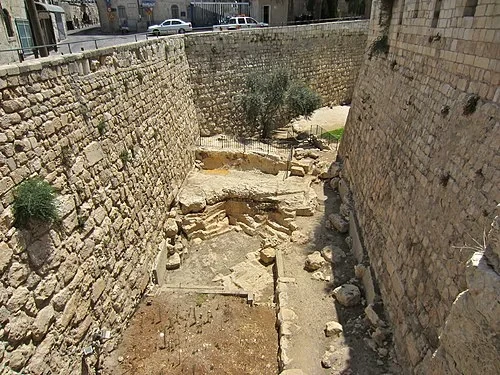 Jaffa Gate and the Outer DefensesThe Dry Moat
This deep trench surrounding the citadel provided a formidable line of defense against any army attempting to scale these walls. Unlike the water-filled moats common in European medieval castles, this is a dry moat. Its primary purpose was to force attackers into a vulnerable position, making it impossible for heavy siege engines or tall ladders to gain stable footing against the base of the fortifications. This defensive system was not a new invention of the Middle Ages; the Crusaders actually restored and expanded upon much older Roman and Byzantine trenches. By maintaining this deep chasm, they effectively protected the vital road that connected the inland city to the busy port of Jaffa on the coast. In times of peace, the moat served as a marketplace and a place for livestock. Looking down into the depths, the sheer effort required to carve this barrier out of solid bedrock becomes apparent. It highlights the lengths rulers went to in order to secure this strategic high ground over several centuries.
brionv from San Francisco, United States · CC BY-SA 2.0
03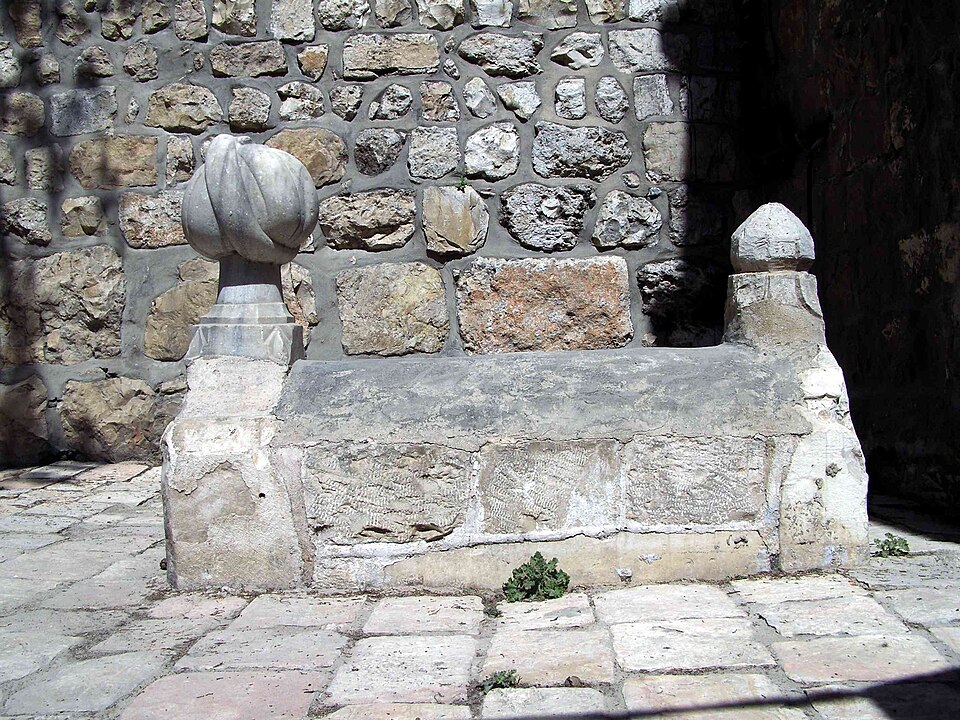 Jaffa Gate and the Outer DefensesThe Architects' Tombs
Resting near the entrance are two small, white-stone graves that hold a dark and enduring legend from the sixteenth century. Local tradition suggests these are the final resting places of the architects commissioned by Sultan Suleiman the Magnificent to rebuild Jerusalem’s walls. According to one story, the Sultan was so enraged when he discovered the holy site of Mount Zion had been left outside the new city perimeter that he ordered the architects' execution. Another version of the legend claims the Sultan killed them to ensure they could never design something even more grand for a rival ruler. Regardless of the truth, the status of the men buried here is clearly indicated by the stone carvings atop the graves. These distinctive turban-shaped markers were reserved for high-ranking officials or esteemed professionals within the Ottoman social hierarchy. The presence of these tombs right at the city's threshold serves as a grim warning of the absolute power held by the rulers who once lived behind these massive walls.
Listen in the appPhoto: Ranbar · CC BY-SA 3.0
04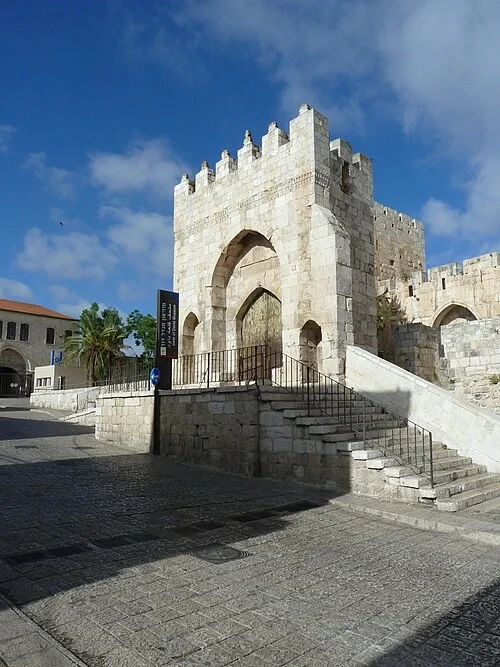 The Citadel Entrance and BarbicanThe Barbican Entrance
The path into the citadel incorporates a clever defensive maneuver known as an L-shaped entrance. This sharp, ninety-degree turn was a standard feature of military architecture across the Middle East. It served a very specific purpose: to break the momentum of a charging army or a heavy battering ram. An attacking force could not gain the speed necessary to smash through the secondary gates, as the narrow, twisting passage forced them to slow down and expose their unshielded sides to defenders above. Above the main gateway, a decorative Ottoman-era inscription marks the completion of the fortifications during the reign of Suleiman the Magnificent. Crossing the stone bridge to reach this point, the transition from the bustling city streets into the quiet, fortified interior of the citadel is complete. This bridge replaced earlier wooden drawbridges that could be raised in times of crisis, completely isolating the garrison from the city outside. The heavy wooden doors and iron studs further emphasize the citadel's historical role as an impenetrable refuge.
Listen in the appUtilisateur:Djampa · CC BY-SA 4.0
05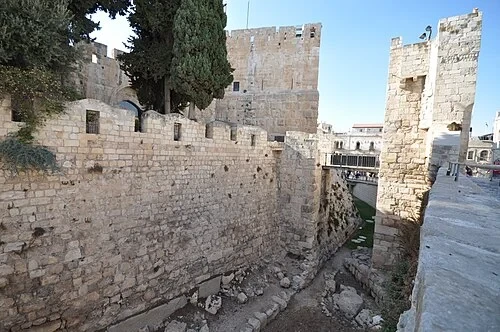 The Citadel Entrance and BarbicanThe Citadel Ramparts
While the lower stones here date back thousands of years, the towering walls and battlements visible now achieved their final form during the Mamluk and Ottoman periods. Sultan Al-Nasir Muhammad initiated a major rebuilding program in 1310, followed two centuries later by the extensive work of Suleiman the Magnificent. Along the top of the walls, notice the row of tooth-like projections known as crenellations. These weren't just decorative; the solid sections, called merlons, provided cover for archers, while the gaps between them, called crenels, allowed soldiers to fire down at an advancing enemy. This design created a protected firing line for the garrison. The masonry used in these upper levels consists of large, well-fitted stones that have withstood centuries of weather and conflict. From this high vantage point, guards could monitor not only the internal courtyard of the fortress but also any movement along the city walls and the hills surrounding Jerusalem. This elevated position allowed the citadel to remain the dominant military structure in the city until the modern era.
Listen in the appJorge Láscar from Australia · CC BY 2.0
06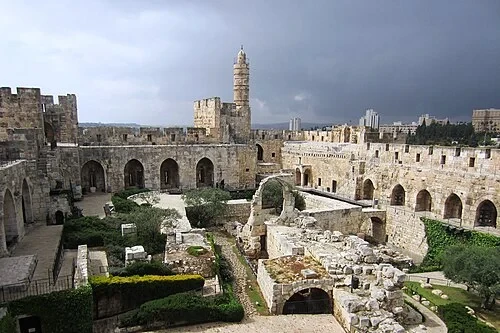 The Archaeological CourtyardThe Archaeological Courtyard
This central courtyard acts as an archaeological palimpsest, where the physical records of many different eras have been written one over another on the same piece of ground. Excavations here have uncovered a continuous history spanning over twenty-seven hundred years. You can see remains from the First Temple period sitting directly beneath fortifications from the Ottoman Empire. This stacking of history occurred because every major power that ruled Jerusalem recognized the strategic value of this specific high ground. Instead of clearing away the past, builders often used the foundations of their predecessors as stable platforms for their own walls and towers. As your eyes move across the ruins, look for the variations in stonework styles. The rough, smaller stones of early Judean walls contrast sharply with the massive, precisely cut blocks from the Herodian era and the later, more uniform masonry of the Crusaders. This dense concentration of ruins provides a tangible map of the city's survival through countless sieges, destructions, and subsequent reconstructions.
Listen in the appMartin Furtschegger · CC BY 3.0
07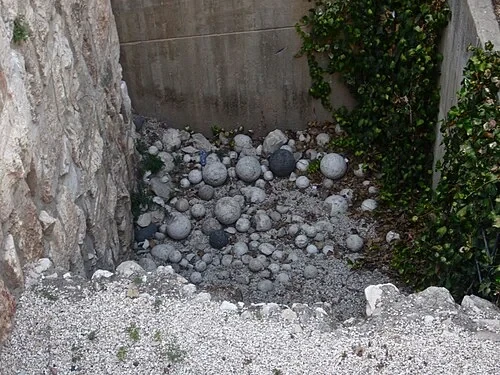 The Archaeological CourtyardRoman Siege Stones
Scattered throughout the courtyard are numerous heavy, rounded stones that offer a direct link to the violence of the Roman siege in 70 CE. These are ballista stones, the ancient equivalent of cannonballs. They were launched from massive catapult-like machines operated by the Roman legions during the Great Revolt. Each stone was meticulously shaped to ensure a predictable flight path when fired from a tension-powered ballista. These projectiles were intended to smash through wooden gates, shatter defensive parapets, and demoralize the city's defenders through sheer destructive force. Finding so many of these stones clustered together suggests that this area was a primary target for Roman artillery. The soldiers would have had to calculate trajectories and wind speed to hit their marks with precision. Handling the weight of a stone like this helps in understanding the massive energy required to hurtle it through the air. These artifacts are not reproductions; they were found exactly where they landed or were stored nearly two thousand years ago during one of Jerusalem's most significant historical conflicts.
Listen in the appbrionv from San Francisco, United States · CC BY-SA 2.0
08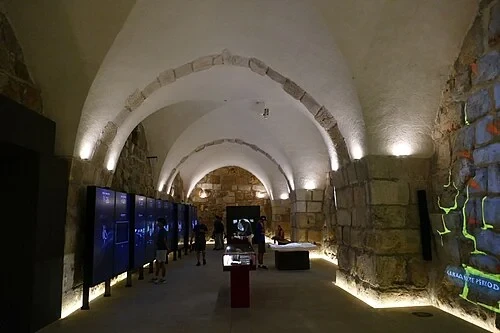 Museum of the History of JerusalemHistory of Jerusalem Gallery
In 1989, the citadel underwent a significant transformation from a military outpost into a modern museum. The galleries that now house the exhibits are actually located within former Ottoman military barracks. Moving inside, the sensory experience shifts dramatically from the bright, open ruins of the courtyard to the cool, dimly lit vaults of the historic buildings. These thick-walled rooms, which once sheltered soldiers and stored gunpowder, now protect delicate historical artifacts and multimedia displays. The museum utilizes these atmospheric spaces to guide visitors through four thousand years of Jerusalem's history, organized chronologically by the various empires and religions that have called the city home. The climate-controlled environment is essential for preserving the models and ancient items on display, contrasting with the weathering stones outside. By repurposing these barracks, the museum allows the historical structure itself to tell part of the story, showing how a site once dedicated to warfare and defense has been reimagined as a center for education and historical reflection for visitors from around the globe.
Listen in the appPhoto: Bukvoed · CC BY 4.0
09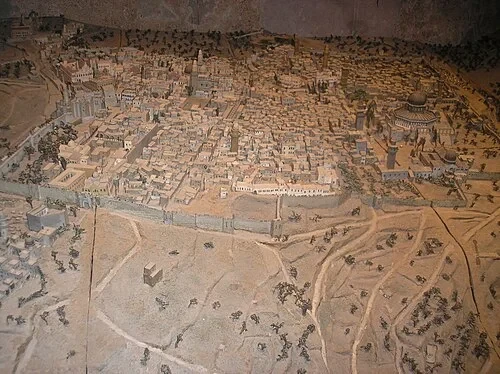 Museum of the History of JerusalemIllies Relief Model
One of the most remarkable items in the museum's collection is this detailed scale model of Jerusalem created in the nineteenth century. It was the work of Stephan Illies, a German architect who spent decades living in the city. Illies originally crafted this model for display at the 1873 World’s Fair in Vienna, aiming to provide Europeans with an accurate depiction of the Holy City. The model is built from zinc and provides a snapshot of Jerusalem just before the modern era of rapid expansion beyond the walls began. Looking at the miniature streets, you can see the incredible density of the Old City at that time. Major landmarks like the Dome of the Rock and the Church of the Holy Sepulchre are prominently featured, while many of the surrounding hills appear as open, undeveloped land. This model is invaluable to historians because it captures architectural details and urban layouts that have since been lost or altered. It serves as a visual bridge, helping to clarify how the city's core has remained constant even as the world around it has changed.
Listen in the appPhoto: Deror avi · Attribution
10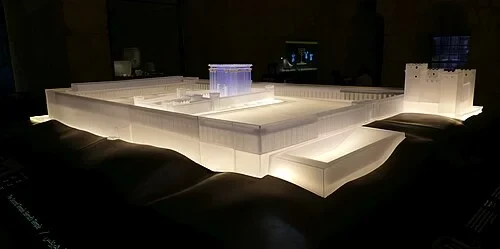 Museum of the History of JerusalemSecond Temple Model
To understand the sheer scale of the city during its architectural peak two thousand years ago, look closely at this reconstruction of the Temple Mount. During the reign of Herod the Great, Jerusalem was transformed into one of the most magnificent cities in the Roman East. Herod was a prolific builder who spared no expense in creating grand structures that would cement his legacy. The model shows the massive platform of the Second Temple, which was once the largest religious complex in the ancient world. Importantly, the very ground where you are now standing was the site of Herod’s royal palace. This palace was a sprawling fortress protected by three massive towers, which Herod named after his brother, his friend, and his wife. These towers were designed to be both luxurious residences and impenetrable defensive bastions. By linking these models to the ruins found in the courtyard outside, it becomes possible to visualize the grandeur that once defined this ridge. This era represented the height of Judean engineering, with masonry techniques that still fascinate architects today.
Listen in the appPhoto: Bukvoed · CC BY 4.0
Tower of David
Frequently asked questions
How much does the guide cost?
Free app download. Listed guide price: $1.99. Guide price shown in the app. Audio guide only. Venue admission is separate.
Can I listen without internet?
Yes. Download the guide’s audio, images, and maps in the app before your visit. Your downloaded content is then available offline.
Can I listen in my language?
Stanza supports 15 languages. Check the app for the languages available for this guide.
Do I need to follow a schedule?
No. This is a self-guided experience. Choose your stops, pause whenever you like, and return to a story at your own pace.
At your own pace
Explore Tower of David.
Download Stanza, then search for “Tower of David”.
Free app download · Guide price shown in the app
Keep exploring
Nearby audio guides
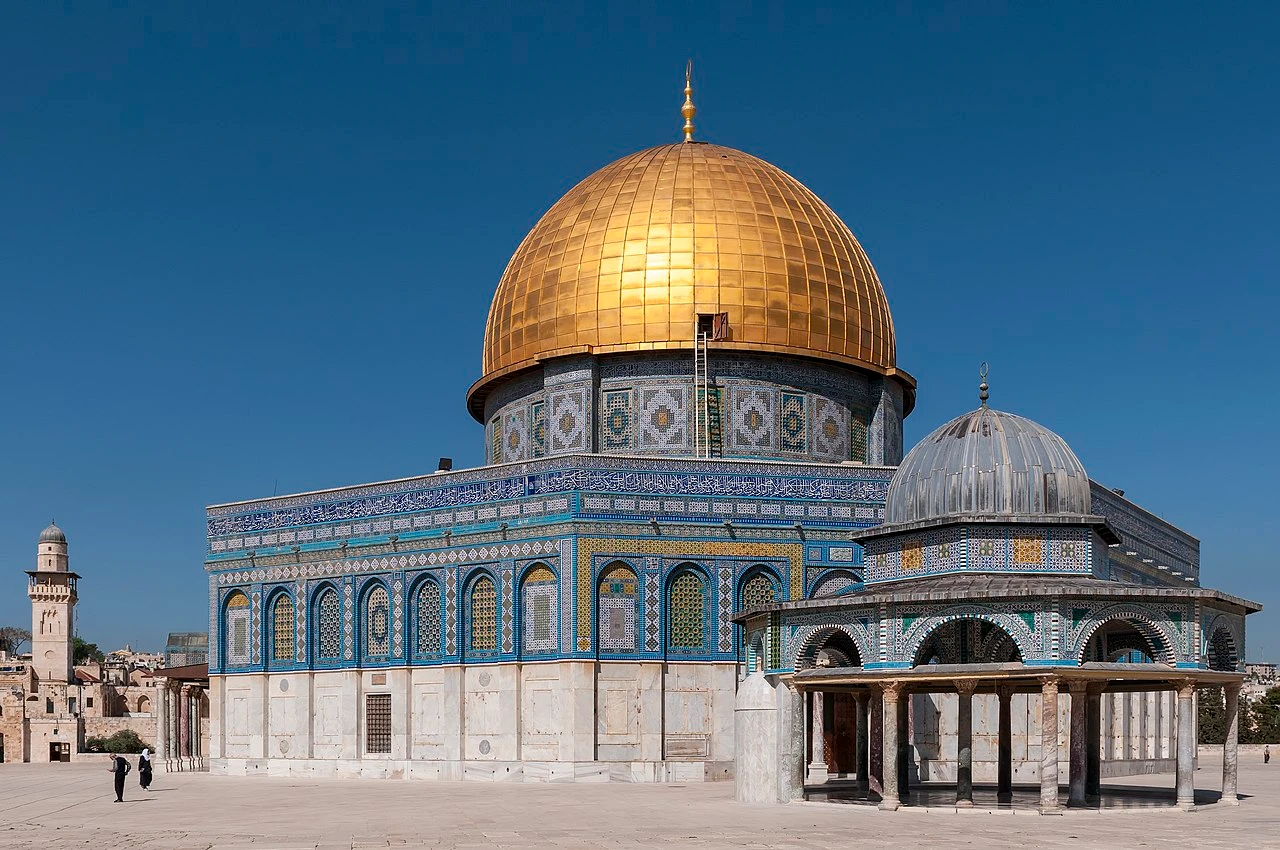
Jerusalem
Dome of the Rock
Content & sources
Photo: Ralf Roletschek · GFDL 1.2
Tamar Regional Council
Masada
Content & sources
Photo: Godot13 · CC BY-SA 4.0